Manage Scroll Interaction Policies
You have several options for managing Prerendering scroll synthetic interaction policies.
- Synthetic Interactions tab - You can manage synthetic scroll interaction policies for an origin on the Synthetic Interactions tab in the web console.

- REST API - Macrometa provides several API calls that allow you to manage synthetic scroll interaction policies.
View Scroll Policies
- Web Console
- REST API
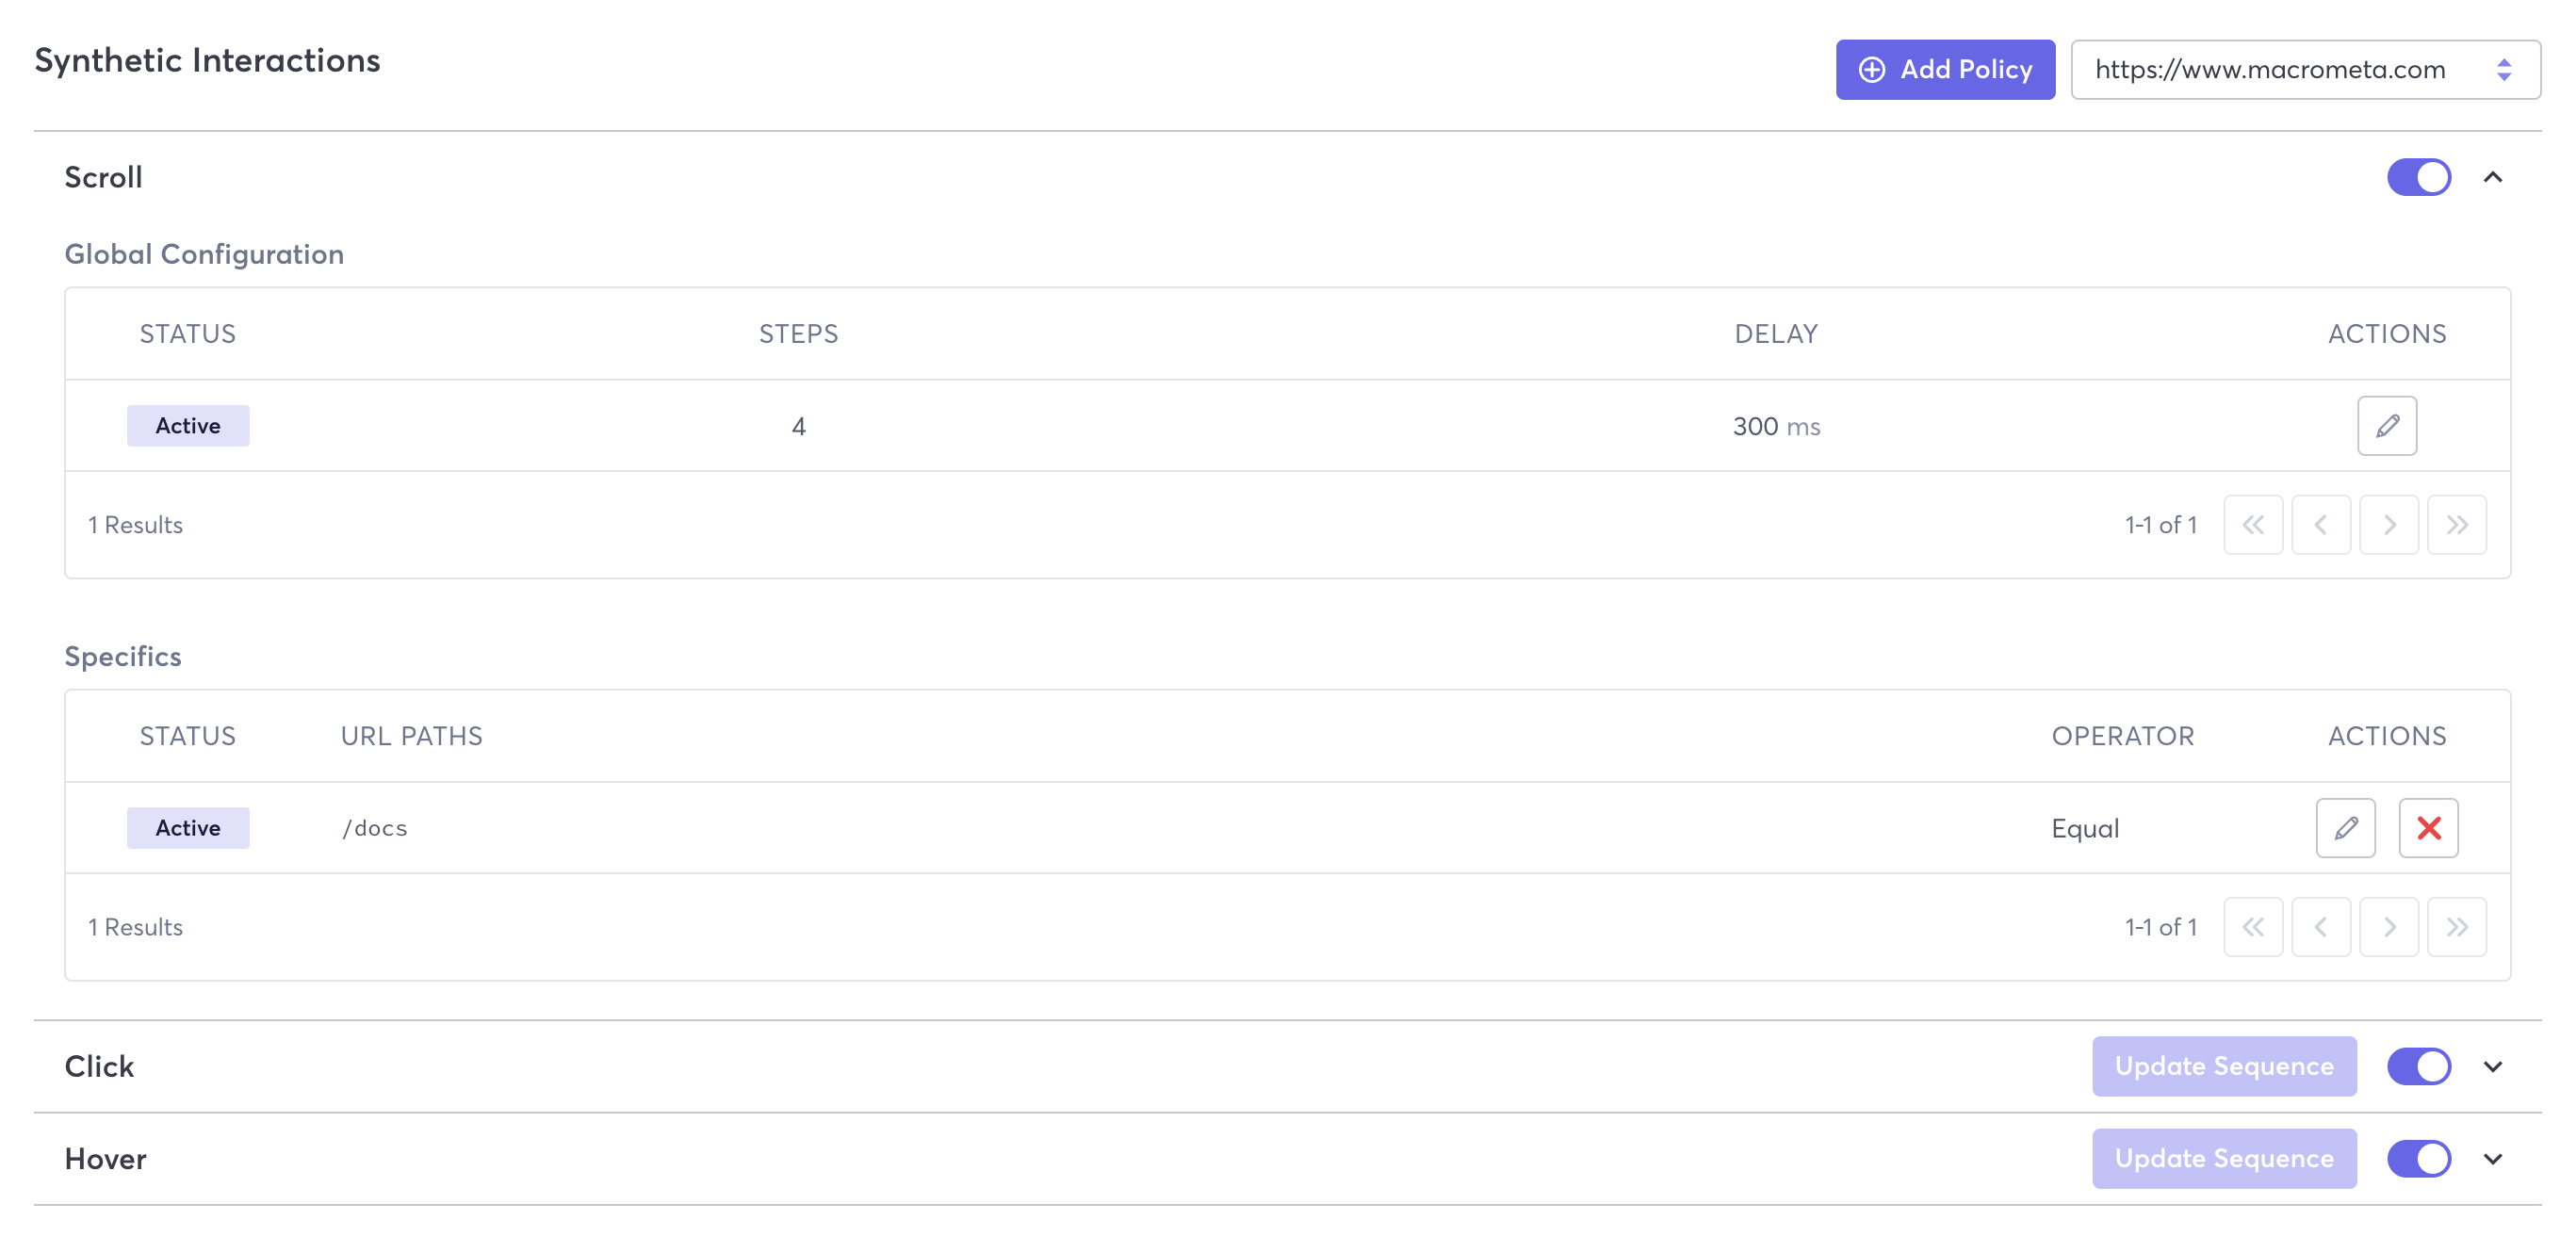
Follow these instructions to view scroll policies in the web console.
- Log in to your Prerendering dashboard.
- Click Synthetic Interactions.
- Select an origin to view scroll policies for.
- Click to expand Scroll to view existing policies.
Use our interactive API Reference with code generation in 18 programming languages to:
Scroll Policy Fields
Prerendering provides the following information about scroll synthetic interaction policies. Field names in the web console are different than those in the API responses. Refer to the API endpoint documentation for a full explanation of the API response.
Global Configuration
The global configuration applies to all origin URLs unless it is overriden by a specific scroll policy.
- Status - Whether the policy is active or inactive.
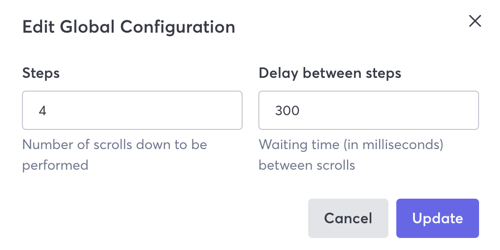
- Steps - Number of scrolls down to be performed.
- Delay - Waiting time (in milliseconds) between scrolls.
- Actions - Click the icon to edit a configuration. You cannot deactivate or delete scroll global configurations.
Specifics
If a specific scroll policy is applied to a URL, then the global configuration will not be applied. The specific policy is applied instead.
- Status - Whether the policy is active or inactive.
- URL Paths - Origin paths where the specific policy is evaluated to be executed.
- Operator - Equal or Not equal.
- Actions - Click an icon to edit or delete a policy.
Add Scroll Policies
- Web Console
- REST API
Follow these instructions to add a new scroll policy in the web console.
Log in to your Prerendering dashboard.
Click Synthetic Interactions.
Select the origin that you want to create the new policy for.
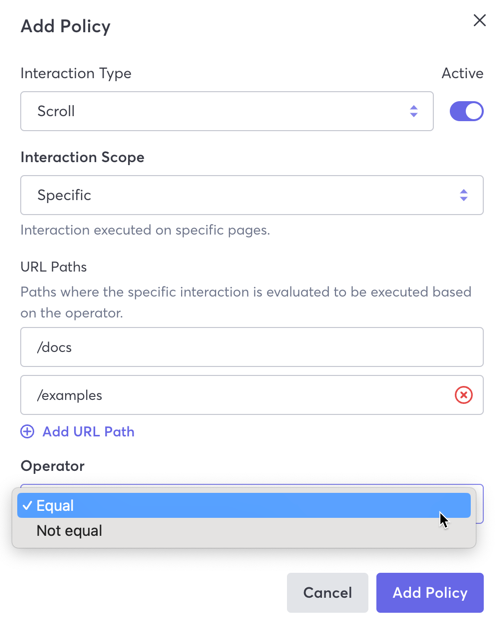
Click Add Policy.
In the Interaction Type field, select Scroll.
If you want the policy to be active immediately, then leave the Active toggle on. If you want the policy inactive, then click to turn it off.
Leave the Interaction Scope on the default Specific. You cannot create global scroll interaction policies.
In URL Paths, enter one or more URL paths to which the policy will either apply or be excluded from, depending on which operator you select.
In the Operator field, select on of the following:
- Equal - Applies the policy to all specified URL paths.
- Not equal - Applies the policy to all origin URLs except the specified URL paths.
Click Add Policy.

Use our interactive API Reference with code generation in 18 programming languages to create a synthetic interaction.
Update Scroll Global Configuration
- Web Console
- REST API
Follow these instructions to update a scroll global configuration in the web console.
- Log in to your Prerendering dashboard.
- Click Synthetic Interactions.
- Select the origin for which you want to edit the global configuration.
- Click to expand Scroll.
- In the Actions field, click the pencil icon next to the global configuration that you want to edit.
- Update any values desired and then click Update.

Use our interactive API Reference with code generation in 18 programming languages to update a synthetic interaction.
Update Specific Scroll Policies
- Web Console
- REST API
Follow these instructions to update a scroll interaction policy in the web console.
- Log in to your Prerendering dashboard.
- Click Synthetic Interactions.
- Select the origin for which you want to edit a policy.
- Click to expand Scroll.
- In the Actions field, click the pencil icon next to the policy that you want to edit.
- Update any values desired and then click Update.
Use our interactive API Reference with code generation in 18 programming languages to update a synthetic interaction.
Delete Specific Scroll Policies
- Web Console
- REST API
Follow these instructions to delete a specific scroll interaction policy in the web console.
- Log in to your Prerendering dashboard.
- Click Synthetic Interactions.
- Select the origin for which you want to delete a policy.
- Click to expand Scroll.
- In the Actions field, click the red X icon next to the policy that you want to delete.
- Click Confirm.
Use our interactive API Reference with code generation in 18 programming languages to delete a synthetic interaction.